
outdoor living Services
Cumming, Georgia

Before You Start An Outdoor Living Project:
Determine why you want to add a new outdoor living element to your backyard. Are you looking to create a seating area, a pathway, a patio, or something else? Understanding your goals will guide your design decisions.
Decide how much you’re willing to spend on your hardscape project. This will influence the materials, size, and complexity of the project. See Pricing below for each bullet point (or best way to word)
Sketch out a basic design of how you want your hardscape to look. Consider the layout, dimensions, and specific elements you want to include. Take into account factors like sun/shade patterns, existing landscape features, and drainage.

Choose your material
Choose your material for Your Outdoor Living Space
Select the materials that best suit your design and budget. Common hardscape materials include:
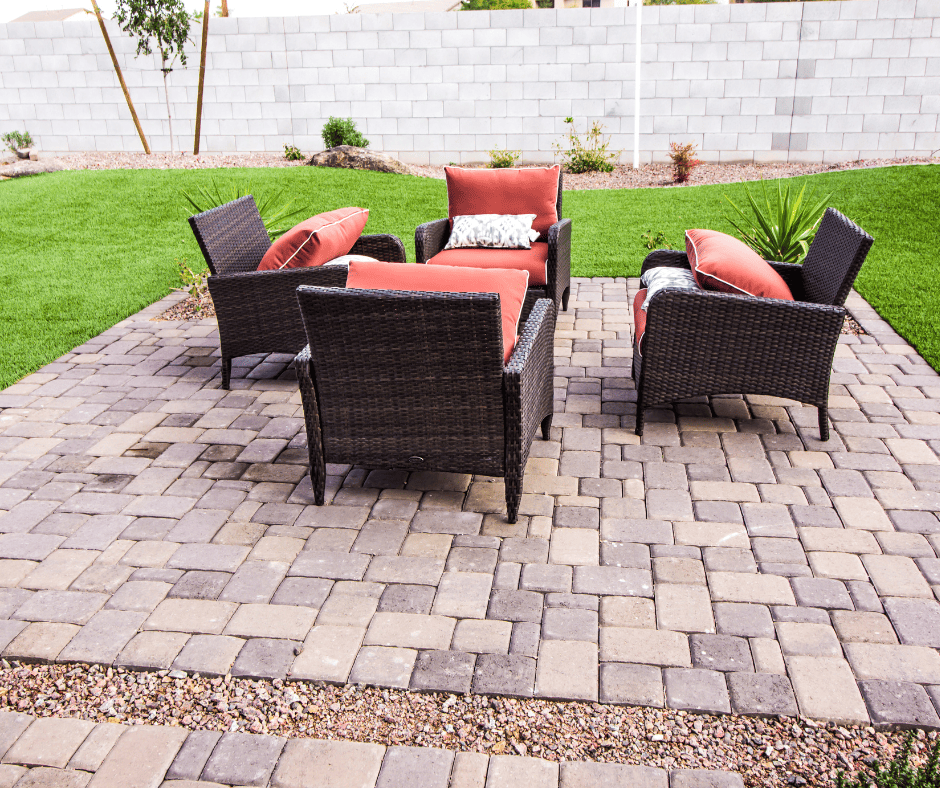
Pavers: These come in various shapes, colors, and patterns, making them versatile for patios and pathways.
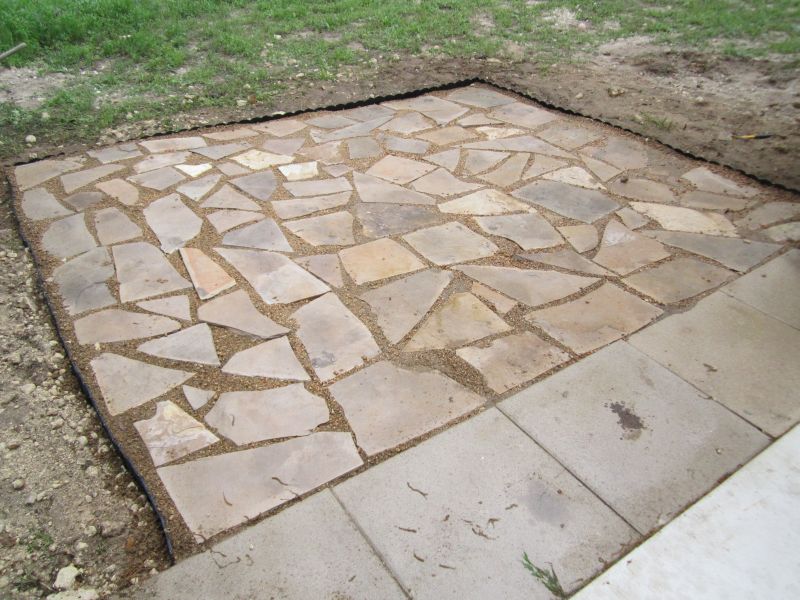
Flagstone: Natural stone with an irregular shape, great for creating a rustic look for your sitting area.
Gravel, river/egg rock or pea pebbles: A cost-effective option for pathways and sitting areas, but may require more maintenance.
Patios or outdoor living spaces
Pavers vs flagstone
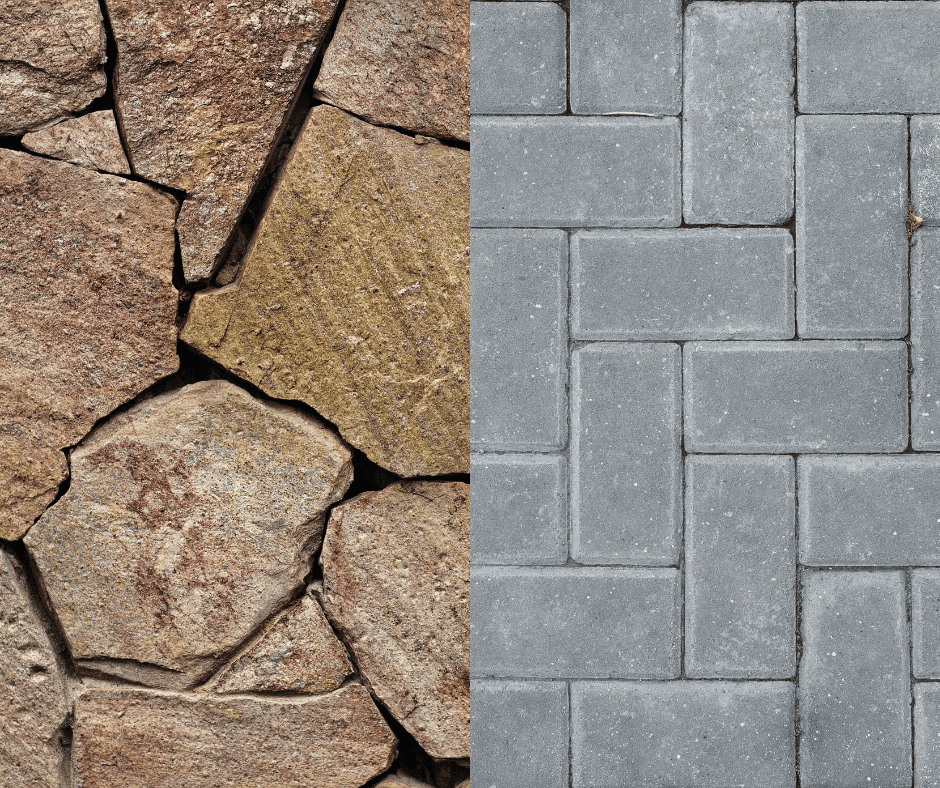
Variety: Pavers come in a wide range of shapes, sizes, colors, and patterns. This gives you more options to customize the look of your patio to match your home’s style or your personal taste.
Durability: Pavers are generally more uniform in thickness and density, making them quite durable and resistant to cracking. They are also easier to replace if any individual paver gets damaged.
Installation: Pavers are relatively easier to install compared to flagstone. They are usually consistent in size, which simplifies the installation process and helps achieve a level surface.
Cost: Pavers tend to be more cost-effective compared to flagstone. If you’re working within a budget, pavers might be the more affordable option.
Maintenance: Pavers can be easier to maintain since they are less likely to develop cracks and can be cleaned more easily.
Flagstone for your patio
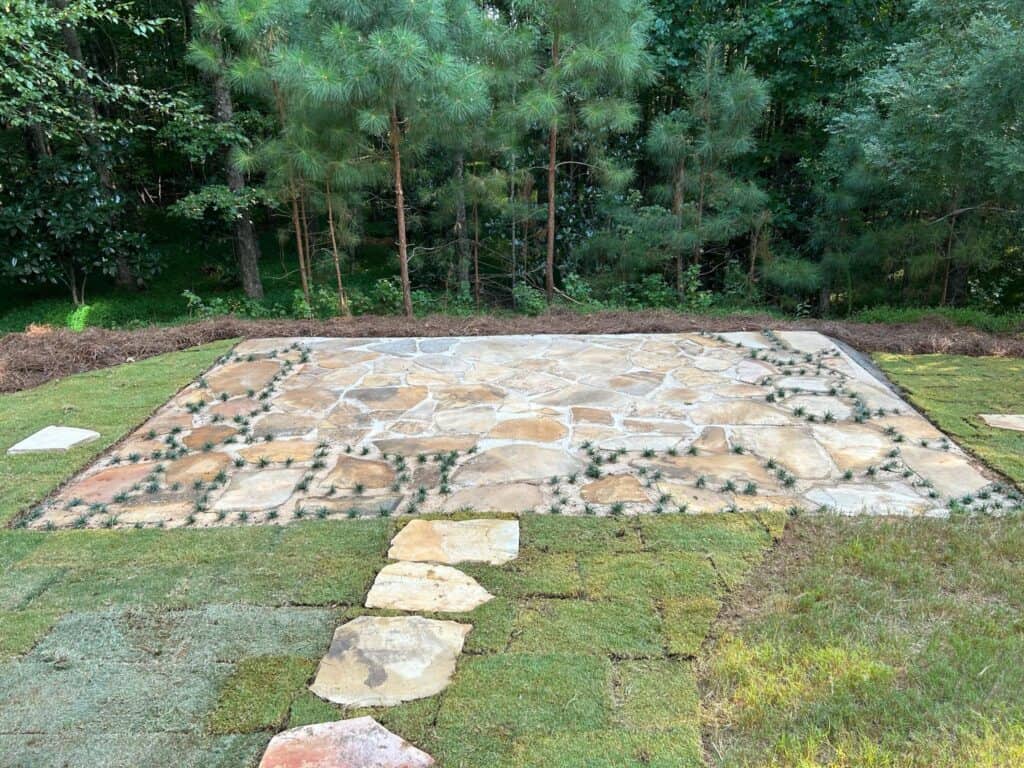
Natural Look: Flagstone offers a more natural and rustic appearance. It comes in irregular shapes and sizes, creating a unique and organic look that many people find appealing.
Variety: While not as extensive as pavers, flagstone still comes in a variety of colors and textures, allowing you to choose a stone that complements your landscape.
Uniqueness: Since flagstone is a natural material, each piece is distinct, adding character and charm to your patio.
Cooler Surface: Flagstone tends to stay cooler in hot weather compared to some types of pavers, which can become quite hot under direct sunlight. However, it is more slip hazard to walk on.
Professional Installation: Installing flagstone can be more complex and time-consuming than pavers, often requiring skilled labor to ensure proper placement and stability.
In the end, your decision will depend on your personal preferences and priorities. If you’re looking for a more versatile, budget-friendly, and easier-to-install option, pavers might be the way to go. On the other hand, if you value a natural, timeless appearance and are willing to invest in a potentially more intricate installation process, flagstone could be the better choice. It’s a good idea to consult with a landscaping professional to get specific advice based on your yard’s characteristics and your vision for the patio.
Patios / Outdoor Seating Areas
There are multiple scenarios that could be possible. Prices are estimated started points
Pavers: 100 sq ft starting at $2600
Flagstone: 100 sq ft starting at $3000
A patio would be basically a paver or rock area made connected to the house or existing structure that is connected to the house. An outdoor sitting area is separated from the house and created to have an area to gather in a shaded area or in a more natural area or have a fire pit and the sitting area made as a part of this all separated from the actual living space.
Sitting Areas Starting at $500
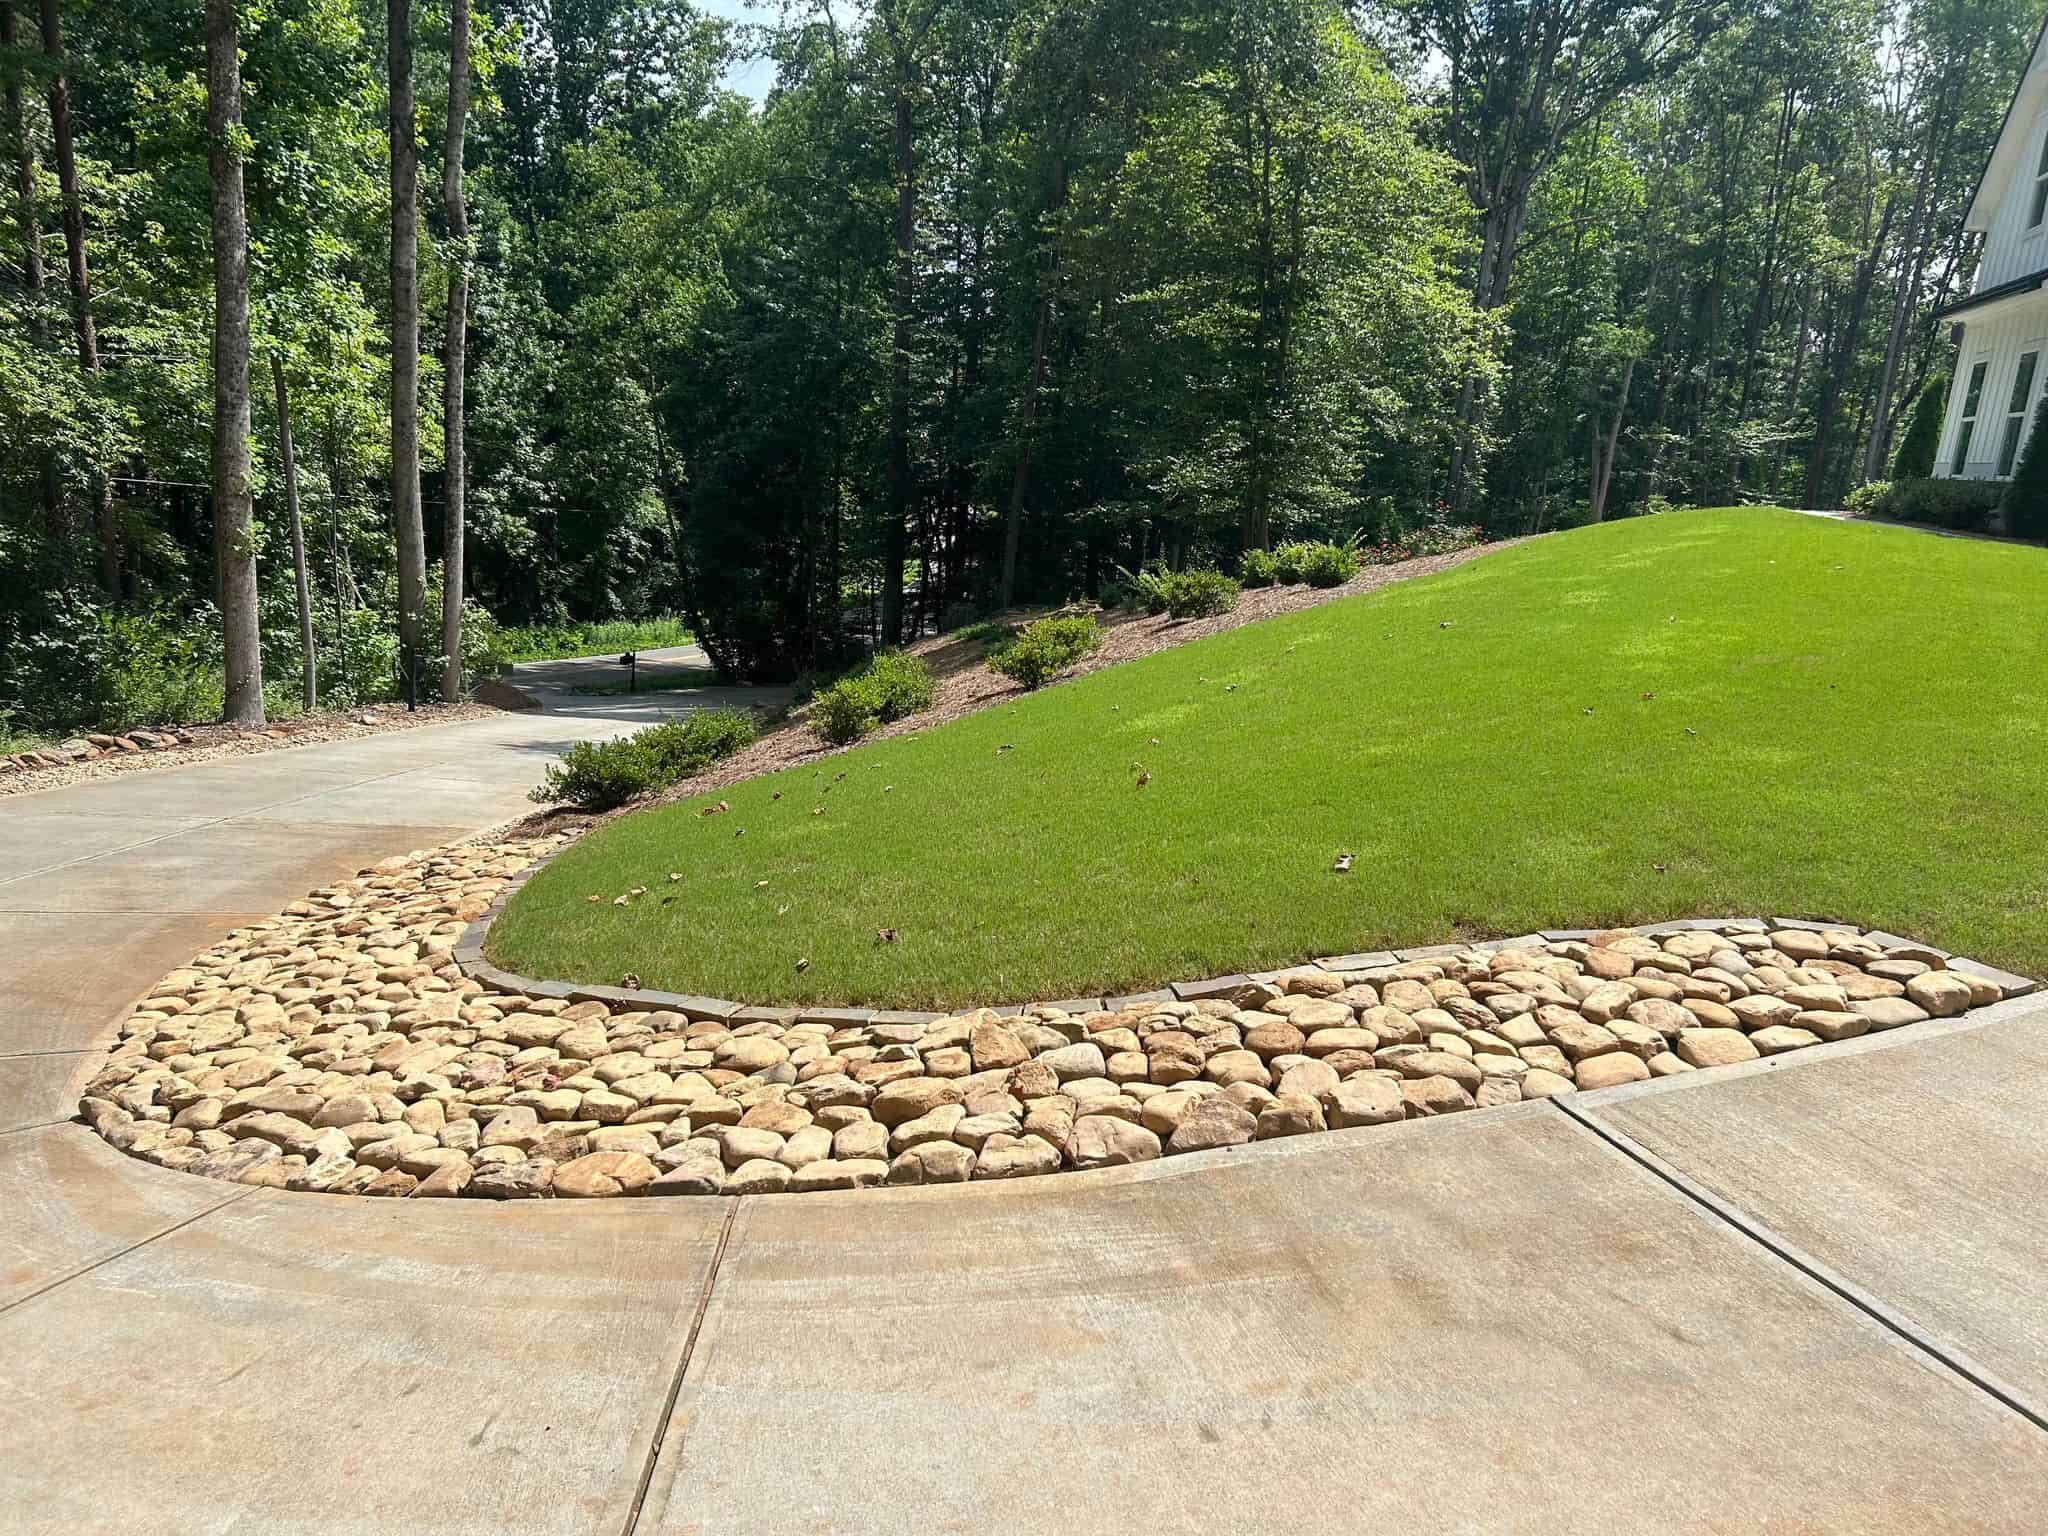
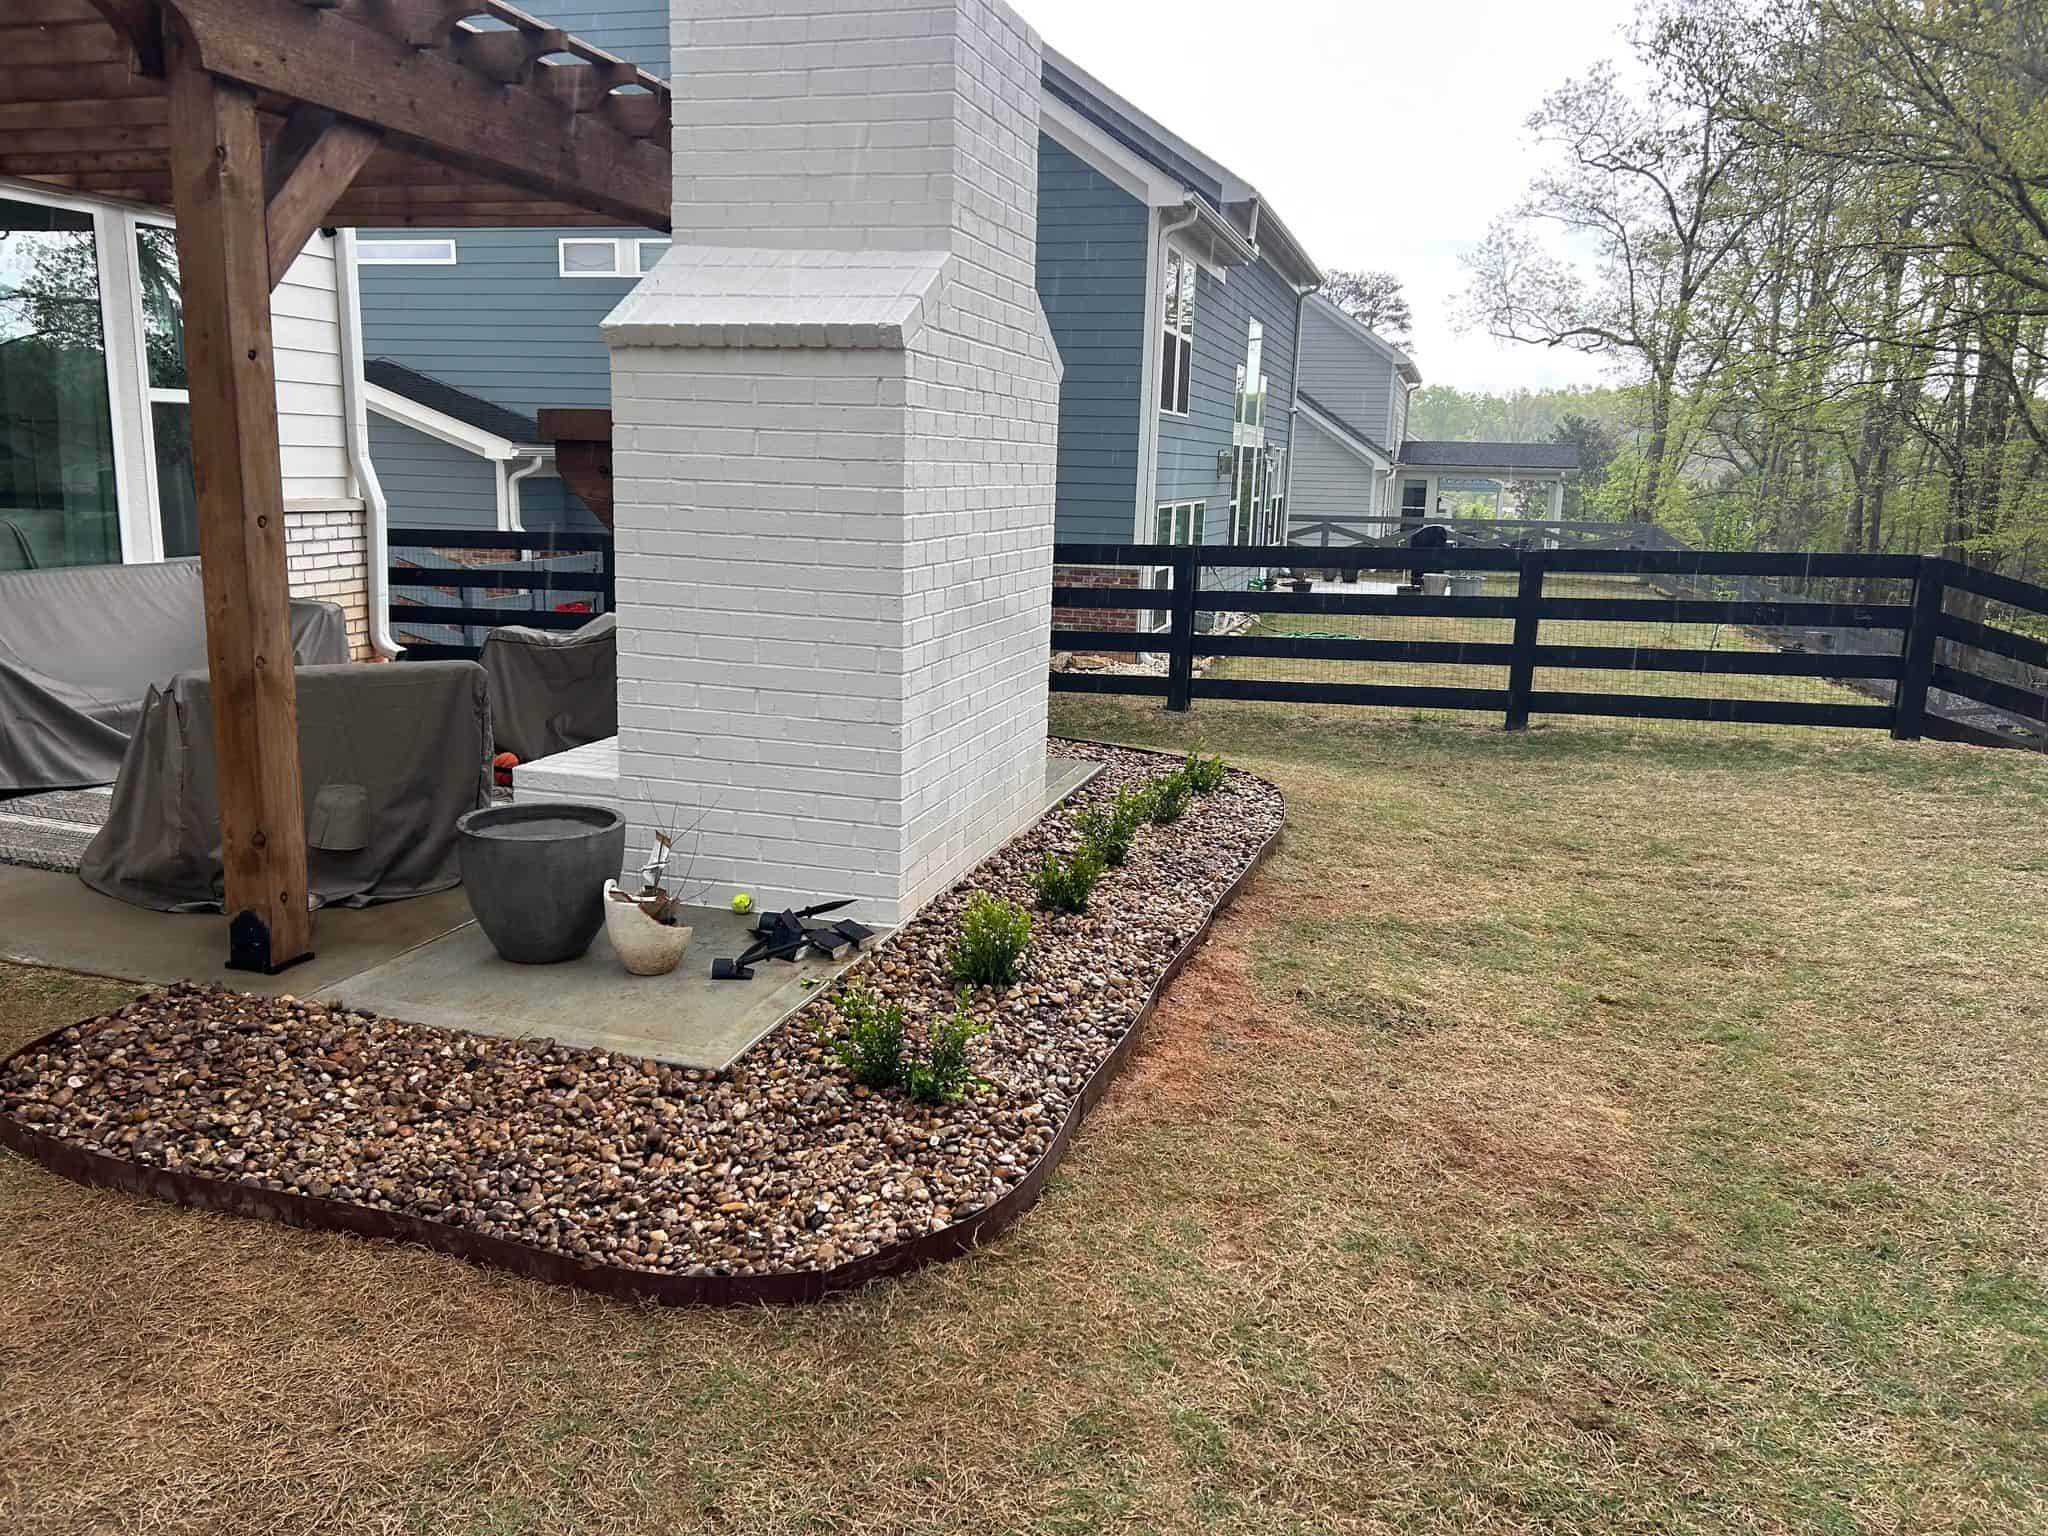
Rock Borders
Rocks can be used to create natural-looking borders that blend well with outdoor environments. Here’s how you can create a rock border:
Choose the right rock, We recommend cobble stone: Select rocks of varying sizes and shapes for a more organic appearance. You can use uniform-sized rocks for a more structured look.
Prepare the area: Clear the area where you want to create the border. This might involve removing grass, weeds, or any debris.
Trench the area: Dig a shallow trench along the desired border line. The trench should be slightly wider and deeper than the rocks you’re using.
Place the rocks: Start placing the rocks into the trench, positioning them firmly. You can bury part of the rocks in the soil to stabilize them.
Backfill and secure: Fill in the gaps around the rocks with soil, pressing it down to secure the rocks in place.
Pricing
Starts at 20 feet $545
Metal Borders
Metal borders offer a more modern and clean-cut appearance. They are often used to create crisp lines between different landscape elements. Here’s how you can install a metal border:
Select medal or Aluminum: We have found that the metal is much cheaper option than the aluminum.
Prepare the area: Similar to the rock border, clear the area and mark where you want the border to be.
Install: Most metal borders come in strips or sections. Insert the metal edging into the ground along the marked border line. You might need to use a mallet to gently tap it into place.
Backfill and finish: Fill in the area behind the metal border with soil, making sure it’s compacted to hold the edging securely.
Remember that proper installation is essential for long-lasting and visually appealing landscape borders. Also, consider the overall aesthetics of your outdoor space and choose materials that complement your existing landscape design. Whether you choose rock or metal borders, both options can enhance the look and functionality of your garden or yard.
Pricing
Starts at 20 feet $475
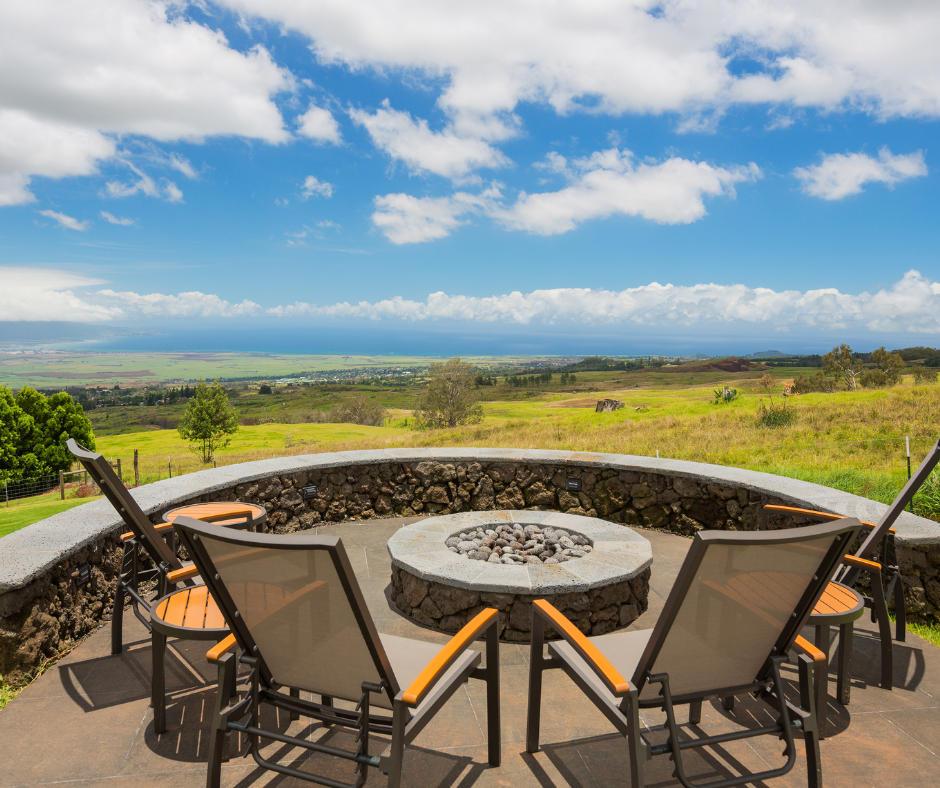
Fire Pit
Adding a fire pit to your outdoor living space can create a cozy and inviting atmosphere for gatherings and relaxation. Here are some steps to help you plan and install a fire pit:
1. Check Local Regulations: Before you begin, check with your local authorities or homeowner’s association to make sure you’re complying with any regulations or permits required for outdoor fire features.
2. Choose a Location: Pick a suitable location for your fire pit. It should be placed away from flammable materials, structures, and overhanging trees. A level and stable surface is important.
3. Select a Fire Pit Type: There are several types of fire pits to choose from:
· Wood-Burning Fire Pit: Offers a traditional campfire experience but requires regular wood supply and cleanup of ashes.
· Gas Fire Pit: Provides convenient and adjustable flames with the flip of a switch. It requires a gas line connection or a propane tank.
· Fire Pit Table: Combines a fire feature with a tabletop surface for a multi-functional space.
4. Design and Style: Choose a design that complements your outdoor space. Fire pits come in various materials such as stone, brick, concrete, metal, and more. Consider the overall aesthetic of your outdoor area.
Seating: Plan seating around the fire pit. Options include benches, outdoor sofas, chairs, and even built-in seating using retaining walls or ledges.
Landscaping: Consider landscaping around the fire pit area to enhance its visual appeal. You could add pavers, gravel, or other landscaping elements.
Maintenance: Regularly clean out ashes if you have a wood-burning fire pit. Gas fire pits might require occasional checks and maintenance to ensure proper operation.
Grilling pads: Grilling pads can be set up in multiple ways. If you have a deck and need a place to put your grill that is in a more fire safe place then adding a grill pad can be a perfect way to do that. We can add them just off your steps or outside your screened in porch. They can be made out of pavers rock or just simple stepping stones.
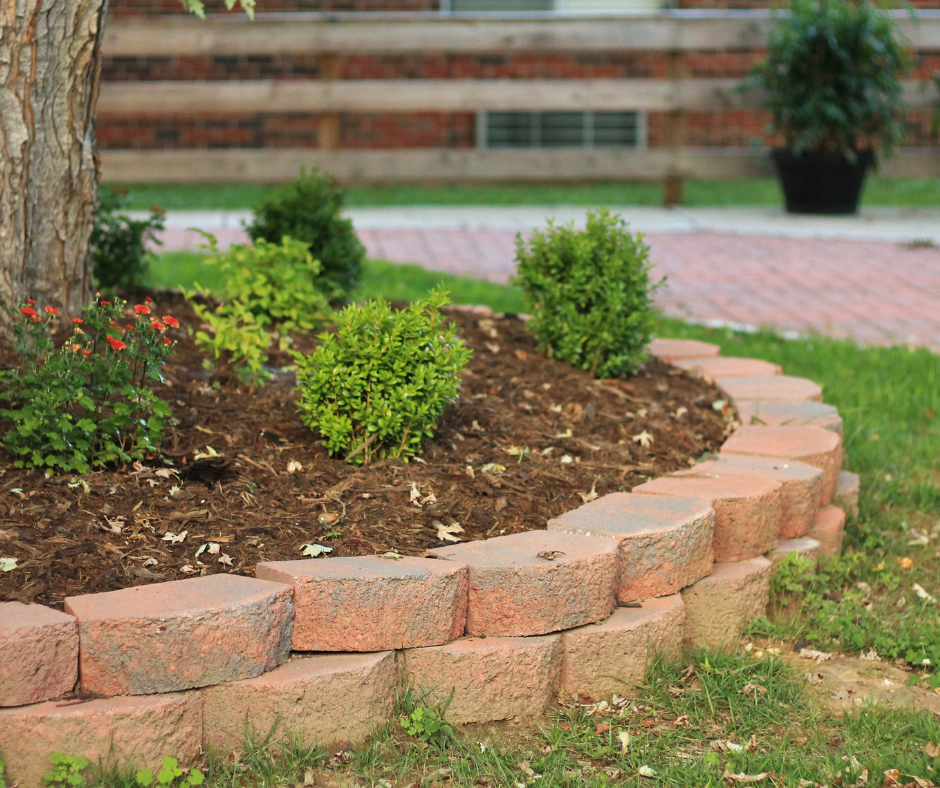
Raised Beds
Raised beds are a popular gardening technique that involves creating elevated planting areas above the ground level. These beds can be used for growing a variety of plants,
including garden vegetables, herbs, flowers, and shrubs. There are several benefits to using raised beds in your garden:
1. Improved Drainage: Raised beds are usually filled with well-draining soil mixtures, which can prevent waterlogging and improve drainage. This is particularly useful in areas with heavy or poorly-draining soil.
2. Better Soil Control: You have greater control over the quality of the soil in raised beds. You can customize the soil mix to suit the specific needs of the plants you’re growing, ensuring optimal growth.
3. Reduced Soil Compaction: Because you’re not walking on the planting area, the soil in raised beds experiences less compaction. This promotes healthy root growth and allows plants to access nutrients and water more easily.
4. Warmer Soil: Raised beds tend to warm up faster in the spring because they are elevated and exposed to more sunlight. This can extend the growing season and provide a favorable environment for heat-loving plants.
5. Easier Access: Working in raised beds can be more comfortable for gardeners, as they reduce the need for bending over or kneeling. This can be especially beneficial for individuals with mobility issues.
Pest Control: Raised beds can be easier to protect from certain pests, as you can install barriers or netting around the bed’s perimeter.
When creating raised beds, consider the following steps:
1. Location: Choose a sunny spot for your raised beds, as most plants require ample sunlight. Ensure the location is convenient for watering and maintenance.
2. Size and Shape: Determine the size and shape of your raised beds based on the available space and the plants you intend to grow. Keep in mind that wider beds are generally easier to manage than very narrow ones.
3. Materials: Raised beds can be constructed from a variety of materials, such as wood, stone, concrete blocks, or even metal. Wood is a common choice due to its availability and ease of construction.
4. Soil: Fill the raised beds with a high-quality soil mix that’s appropriate for the plants you’re growing. You might need a mix of topsoil, compost, and other amendments.
5. Planting: Plan your planting layout based on the mature size of the plants and their sunlight requirements. Follow proper spacing guidelines to ensure healthy growth.
6. Maintenance: Regularly water, fertilize, and monitor your plants’ health. Keep an eye out for pests and diseases, and address any issues promptly.
Raised beds offer a versatile and efficient way to cultivate a wide range of plants in a controlled and productive environment.
Pricing starting at $375
Grilling Pads
Grilling pads:multiple ways. If you have a deck and need a place to put your grill that is in a more fire safe place then adding a grill pad can be a perfect way to do that.
We can add them just off your steps or outside your screened in porch.
They can be made out of pavers rock or just simple stepping stones.
Prices vary and start at $500